


Halloween is right around the corner so this past weekend I finally got around to decorating the pumpkins I picked up a couple of weeks ago. When I was thinking of ideas for my pumpkins I knew I didn’t want any kitschy designs like a Jack O’ Lantern or spooky scene. I wanted my pumpkins to be super chic as well as neutral in color so I could easily incorporate them into my decor. I also wanted to come up with something simple that I could execute quickly and easily using leftover materials I already had at home. I ended up creating three totally stylish designs using cans of gold and off white spray paint and an old bottle of acrylic paint (leftover from this DIY) that I had lying around. If you still want to get into the Halloween spirit and are short on time, here are my 3 easy ways to create a Halloween Pumpkin using simple paint techniques!
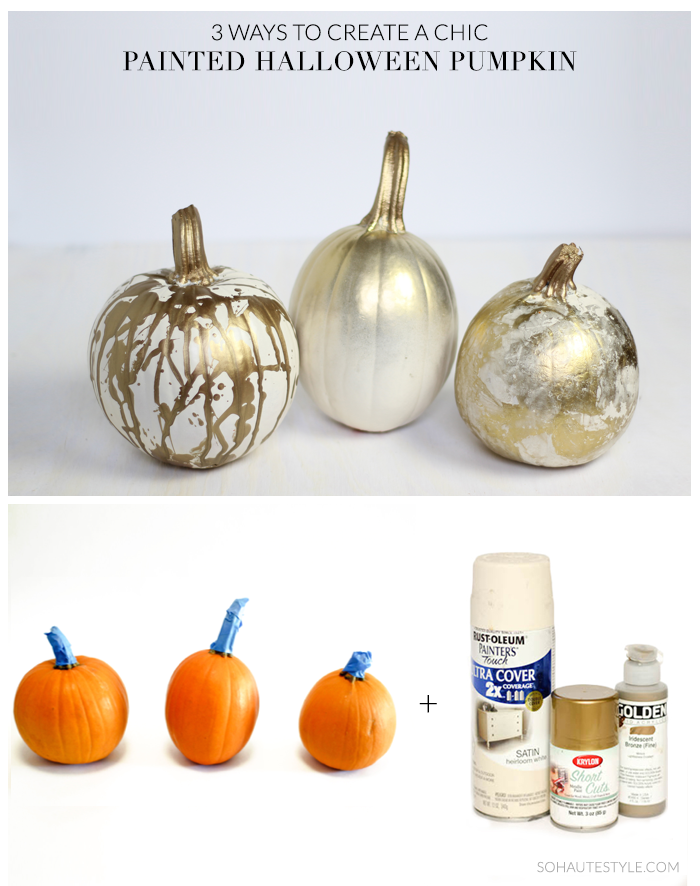
I started off by taping off the stems and spray painting each pumpkin off-white which I knew would look fabulous with the shades of gold layered on top. While those dried I ran a few errands and came back and finished off the pumpkin designs in no time! Here’s how…
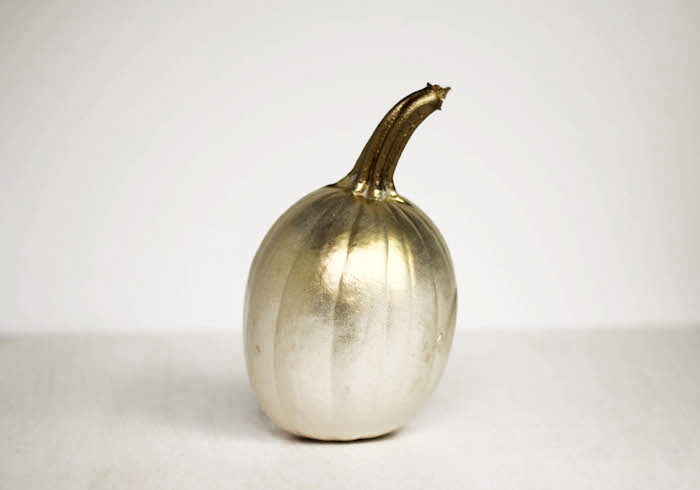
OMBRE PUMPKIN
Using a sponge brush, I started by painting the stem with the acrylic paint which had a darker, bronzy tone. Next I grabbed my can of spray paint and lightly dusted the pumpkin about 2/3 of the way down. Then, from the top I added another layer of gold about 1/3 of the way down and finally, another opaque layer at the top about 1/4 of the way down. This technique is really all about maintaining just the right amount of very pressure on the nozzle so you can control the coverage. You want to use a very light amount of pressure when creating your ombré pattern because just like cooking ingredients, you can always add more if you haven’t achieved your desired coverage but once you add too much, there’s no going back!
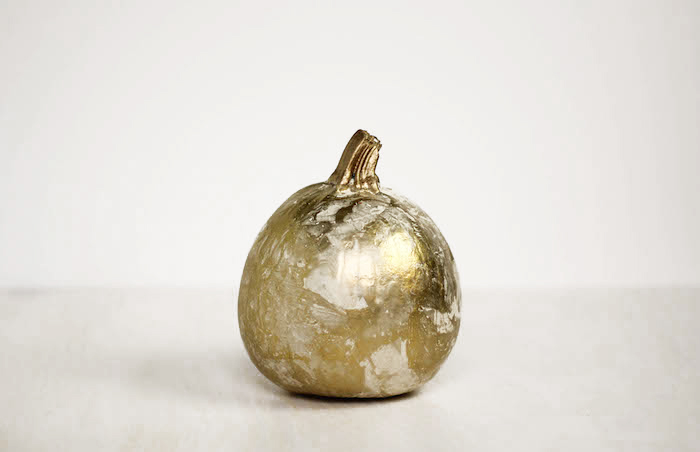
MARBELIZED PUMPKIN
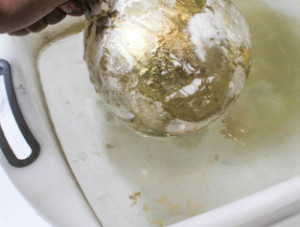
To create a marbelized pattern start by filling a utility bucket with lukewarm water. (If the water is too cold, your paint will start to solidify on the water’s surface which you don’t want.) Next, spray a light layer of paint onto the surface of the water and very quickly, rotate your
pumpkin across the surface of the water to coat the skin with paint. (Do not submerge it or you’ll end up with a messy looking pumpkin!) You should start to see your marbleized pattern come to life as you rotate the pumpkin. I included a photo of this step below. If you’ve picked up all the paint off the surface and still need more, spray another layer of paint onto the water but before you do, remove any solids that may have formed using something sturdy like a piece of cardboard or even a business card will do. Once you’ve achieved your perfect marbleized pattern, set your pumpkin set it aside to dry. After it’s completely dry, wipe it down with a paper towel to remove any dried excess.
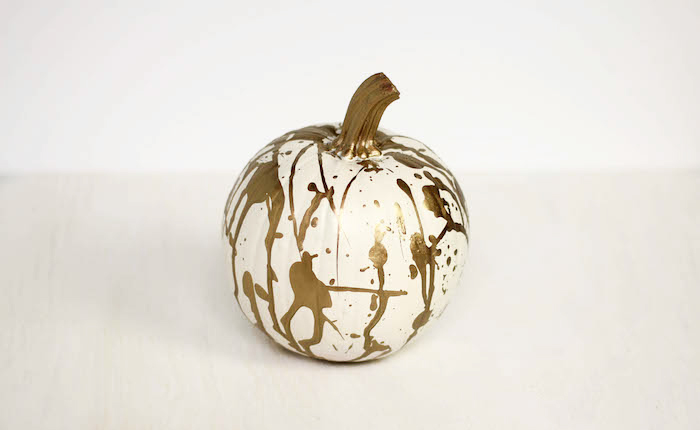
SPLATTER PAINT PUMPKIN
This one is my favorite of the three and was so fun to do! I squeezed my acrylic paint into a small container that holds about 3 oz of liquid and used a plastic spoon to create my paint splatters. My paint was extra heavy so I diluted it a bit with water first. Then I dipped the back of the spoon into the paint and created large splatters using a quick snapping wrist motion with my hand about a foot away from the pumpkin. Then I dipped the handle of the spoon into the paint and used the same snapping wrist motion to flick the pain onto the pumpkin. Using the handle produced all of the linear splatters that you see.
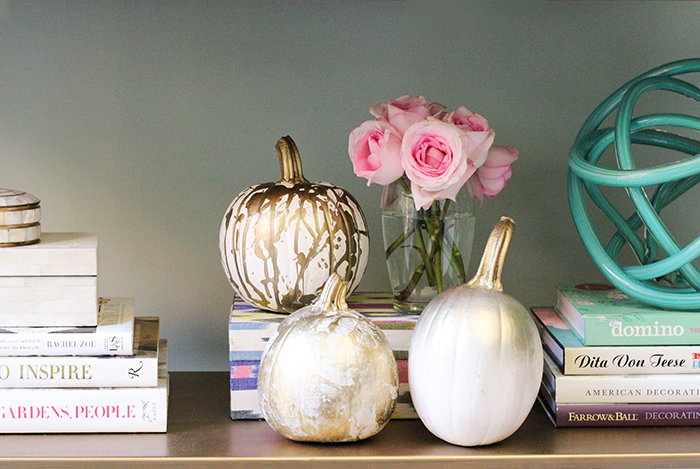
Here’s how I styled my pumpkins on my bookshelf! I hope these easy ideas inspire you! I’d love to hear about how you decorate your home for Halloween. Please share in the comments below! Happy Halloween! xo


5 Comments
Love these pumpkin painting ideas! I am always amazed you are able to spray paint where you live. I always have to do my spraying outside. How are you able to do it inside without making a mess. Love your style!
Ha! I should have taken a picture of my painting set up. I did it in my building hallway (I’m sure my neighbors were annoyed) and laid out a tarp and the whole nine. I didn’t want those fumes in my apartment! Glad you like the ideas!
You’re very resourceful! Love you’re blog!
Loving this idea! I’ve followed your blog since you did the ‘Black Enterprise’ segment on TVOne & finally got the guts to start commenting. —This post inspires me to try a pink & gold version of this 🙂
Anita – Thank you SO much for reading and for commenting! I am happy you’re here and glad you’re getting inspired with new ideas! xoxo